How to Install Artificial Turf Yourself: The Complete DIY Guide
With artificial turf, landscaping is easy, making your yard more comfortable and beautiful while ensuring a long-lasting choice. Our imported artificial lawns are designed and manufactured to capture the best qualities of natural grass, but with added benefits: they are low-maintenance, durable, always lush, and, of course, long-lasting. With even minimal proactive care, you can enjoy your artificial turf yard for years to come!
All of our artificial turfs come with a minimum 7-year UV guarantee. Every one of our products is manufactured in Europe and follows sustainable development principles.
Below, you’ll find all the information you need to install the artificial turf yourself. A well-planned project is half done. We wish you many happy moments enjoying your high-quality artificial turf!
Artificial Turf Installation Plan
The first step when purchasing artificial turf is to calculate the square meters you need and determine the seam locations for the installation area. You can do this by creating an installation plan.
Here are some important points to consider:
- When installing artificial turf on areas wider than four meters, ensure the turf strips are laid parallel and in the same direction. Turning the turf will cause an optical color variation, similar to what you see on a soccer field when watching on television.
- Allow for at least 15 cm of extra material in both width and length to account for waste during installation.
- The blades of the artificial turf should be angled towards the primary viewing area, which is typically a patio or deck in a backyard. The direction of the grass blades is always along the length of the roll, never the width.
- Artificial turf is delivered in rolls that are either two or four meters wide.
- The turf weighs approximately 3 kg per square meter. Be sure to consider the length of the rolls (2-meter or 4-meter rolls) and the total weight of your order.
- Ensure you have enough help to receive and install the artificial turf. Typically, a single person is not enough for the installation, so it’s a good idea to have several helpers.
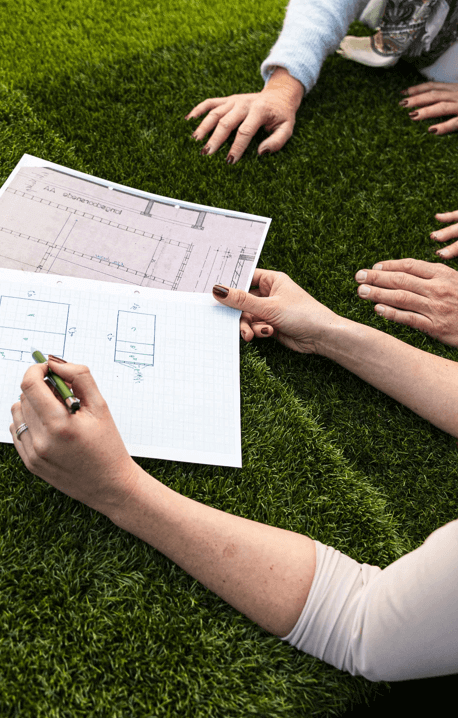
If you have more than one roll of artificial turf, you’ll need seaming tape or a self-adhesive seam tape to join the sections together. Your installation plan will help you easily calculate the amount of seaming material you need.
Remember to also account for the required amount of artificial turf adhesive if you’re using seaming tape. Our adhesives have an estimated coverage listed per meter.
Base Preparation for Artificial Turf
The basic requirements for preparing the base for artificial turf are similar to those for installing paving stones and patios.
- Excavate the area. Remove the existing lawn and other vegetation, and dig down about 10–20 cm before laying down the geotextile fabric.
- Install a weed barrier. Lay the geotextile fabric precisely over the entire area, ensuring no bare ground is visible.
- Add a gravel base. Spread a layer of crushed stone about 5–15 cm thick on top of the fabric. We recommend using finely crushed rock (KaM 0-11 mm).
- Compact the gravel. Thoroughly level and compact the crushed stone layer with a plate compactor. We recommend at least a 60 kg compactor. For best results, it’s a good idea to water the crushed stone before compacting. You can easily rent a compactor from a place like Ramirent.
- Remove large stones. After compacting, remove any large loose stones from the surface of the crushed stone layer.
- Ensure proper drainage. Account for any necessary slopes or drainage channels.
- Add the final layer. Finally, spread a fine layer of crushed stone dust (KaM 0-3mm) over the entire area, with a thickness of 2–5 cm. This ensures a smooth, even finish.
A proper base is the key to installing a beautiful, high-quality, and well-draining lawn. For the best result, the base must be completely flat. Never install artificial turf directly on top of soil or clay. Always use a stable, level, and frost-proof crushed stone base.
Artificial turf is also excellent for installation on hard surfaces like balconies and bitumen roofs. When installing on a hard surface, the sub-base must have proper drainage. The surface must be completely flat, and any necessary slopes must be adequate.
The Edging for Artificial Turf
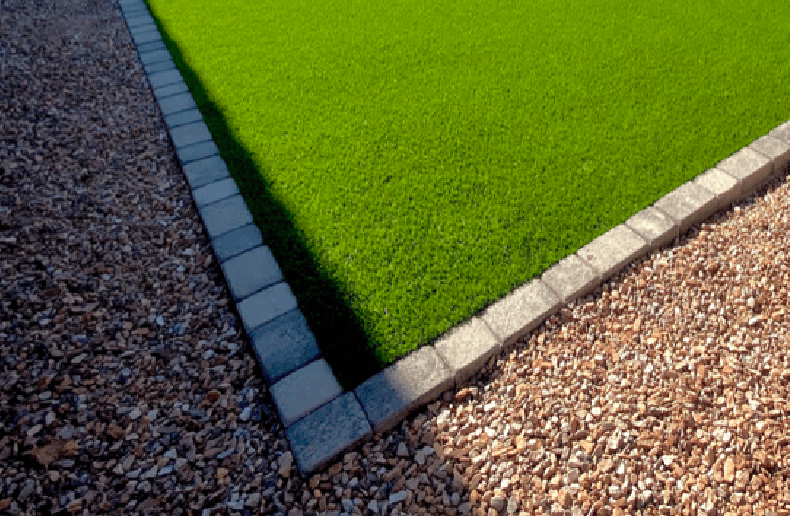
For the best-looking result, you should install a proper edging for your artificial turf. In this method, the leveled gravel base is left about 2 cm below the level of the edging. When installed this way, the edge of the artificial turf is well protected, and the lawn has a neat, finished look.
You can create the artificial turf border with a variety of materials, such as:
- Natural stone
- Concrete pavers
- Treated wood
- Plants and landscaping
Choose the material that best suits your yard’s style for a beautifully integrated look.
Before You Install Your Artificial Turf
Before you begin the installation, there are a few important steps to follow to ensure a smooth process and a flawless final result.
- Handle the rolls with care. Avoid rough handling, folding, or creasing the rolls, as this can damage the turf. Always keep the turf rolled up and never fold it in half, even for a moment.
- Verify your order. Before cutting, make sure the rolls you received are the correct size for your project.
- Check the base. Double-check that all your base preparations are done carefully and correctly.
- Watch the temperature. The ideal installation temperature for artificial turf is between 10°C and 25°C. On a hot day, we recommend unrolling the turf, roughly cutting it to size, and letting it acclimate for a day before installation. This helps prevent cutting errors that can occur when the turf expands in the heat.
- Install on a dry day. Perform the installation on a dry day to ensure the seams can cure properly.
- Secure the seams. To ensure the seams bond correctly, walk along them after applying the adhesive. You can also place heavy objects along the newly glued seams. It’s best to avoid heavy traffic on the turf for the first 24 hours to allow the seams to set completely.
- Get the right tools. You will only need a measuring tape and a sharp utility knife or a specialized artificial turf cutter for the installation
What is a shock pad for artificial turf?
A shock pad, also known as a safety pad, is often used under playground equipment as a fall-protection surface. It’s a textured and grooved mat that is installed beneath the artificial turf, allowing water to flow through it. This prevents rainwater from pooling on the turf, keeping the surface dry even in wet weather.
The advantages of synthetic shock pads include their durability and easy maintenance. We offer a wide selection of different safety and shock pads. We are happy to help you find the best solution for your specific needs.
Installing Artificial Turf
1. Shock Pads for Artificial Turf (Optional)
You can choose to install a shock pad or safety pad under your artificial turf, especially if your yard has playground equipment like climbing frames or other areas where someone could fall. The stone dust layer beneath the shock pad should be leveled to ensure that the final turf surface is as even and consistent with the rest of the yard as possible.
We offer several different thicknesses of shock pads. The required thickness of the pad is determined by the potential fall height.
2. How to Roll Out and Cut Your Artificial Turf
Start by unrolling the artificial turf at the installation site. Give the turf an hour or two to settle in place before the final installation.
Overlap and align. Overlap the turf sections at the seams by about 10 cm. This is a good time to double-check that the grass blades on all adjacent rolls are pointing in the same direction.
Leave extra material. Leave about 10 cm of extra turf on the outer edges as well. Cut these outer edges only after all the seams have been joined. This makes seaming much easier since you won’t have to worry about running short on material, and it helps prevent gaps at the seams.
Cut the seams first. Only after all the seams are glued together should you go back and trim the excess turf from the outer edges.
Handle obstacles with care. You can cut artificial turf into almost any shape, but the complexity of the surface will determine how challenging the installation is. Objects and obstacles like flower beds, trees, or rocks will make the process more difficult. Make sure the turf is lying flat and not stretched too tightly before you glue the seams.
Cut from the bottom. Always cut the artificial turf from its underside. This prevents damage to the grass fibers. The fiber lines on the bottom of the turf also provide a great visual guide for making straight cuts.
3. Cutting the Seams of Artificial Turf
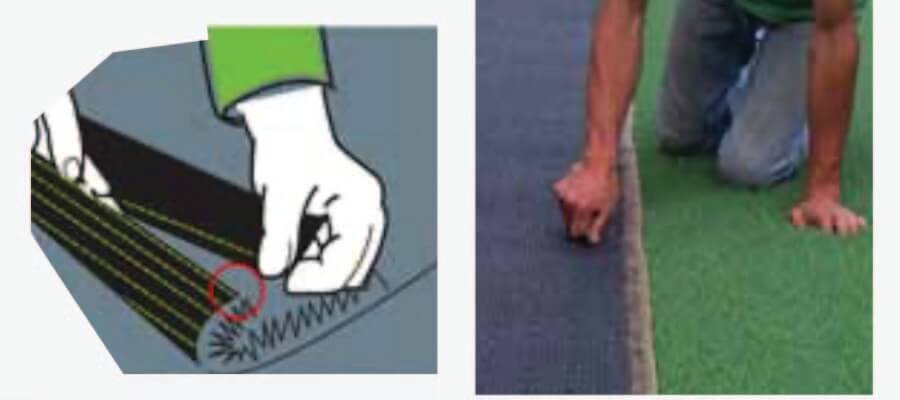
Using a sharp utility knife or a specialized artificial turf cutter, cut a strip off the edge of the turf mat. A good place to cut is between the first and second rows of fibers. Since the roll is 4 meters wide, you’ll have plenty of material.
Make sure the edges of the two turf mats are as close as possible to each other, but ensure they do not overlap. This step must be done very precisely to make the seam as unnoticeable as possible. Examine the seam from several different angles before you glue the turf mats to the seaming tape.
4. Gluing the Seams of Your Artificial Turf
Once your turf sections are perfectly aligned, it’s time to join them together.
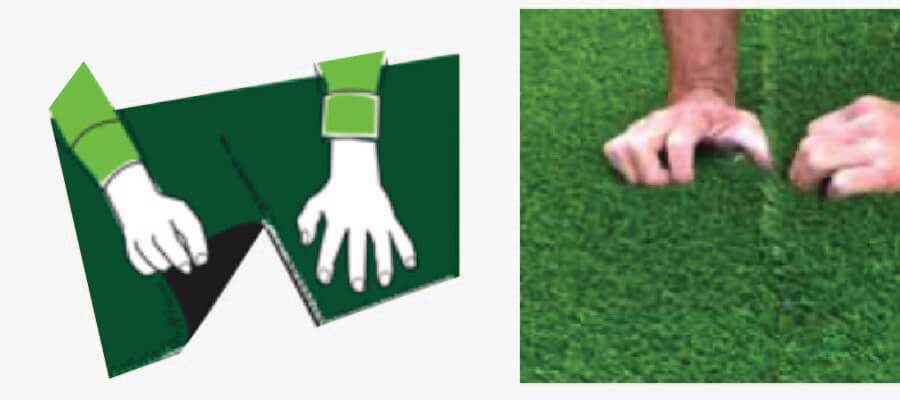
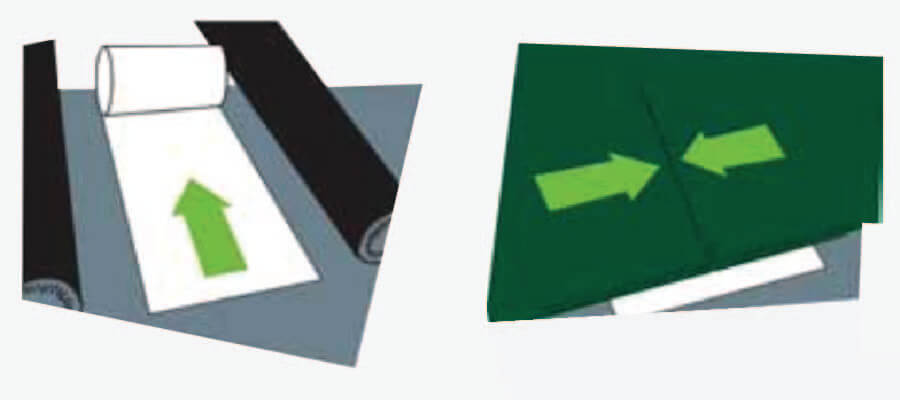
Prepare the seam with glue and tape. First, fold back the edges of both turf sections. Unroll the seaming tape down the center of the seam line. Apply the required amount of artificial turf adhesive onto the tape, using a standard adhesive trowel.
Join the sections. Carefully fold the edges of the turf back over the seaming tape. Press the turf down firmly onto the tape, walking along the seam multiple times to ensure the glue and tape bond securely to the turf. Finally, place heavy objects along the seam to ensure a tight bond. Depending on the adhesive used, the glue will cure in a few hours up to one day.
Using self-adhesive seaming tape. Alternatively, you can use self-adhesive seaming tape for an easier installation. Fold back the edges of the turf, unroll the tape along the seam, and cut it to the same length as the turf sections. Remove the protective film from the tape. Attach the turf sections to the tape, ensuring they are evenly aligned without any gaps or overlaps. Press the seam down by walking on it. The seam will bond immediately, so don’t try to open it to check if it has stuck.
Important considerations:
Temperature matters: The adhesive strength of both the glue and the tape decreases below 10°C, so always install your artificial turf in dry and warm weather.
Keep it dry: The seaming tape, adhesive, and the back of the turf must be completely dry. Never do a seam connection in the rain.
Please note the following installation guidelines:
- Never apply more than 2–4 mm of adhesive.
- We recommend using our glue machine and glue box to ensure even glue distribution. Ask our sales team for more information about these tools!
- Use a joint roller after application.
- If humidity is high or the substrate is damp, ensure you apply extra pressure to the joint for a certain period. You can do this by placing, for example, sandbags on the joint.
- Please be aware that single-component adhesives have the chemical property of expanding when exposed to moisture.
If you have any upcoming projects and are unsure about the installation process or have any questions, please don’t hesitate to contact us—we are happy to help.
5. Final Touches and Other Considerations
Artificial turf can also be installed on flat ground without additional fasteners. However, if you’re installing turf for a high-traffic area like a children’s play space, we highly recommend adding a thin layer of infill sand.
Adding Infill Sand
Infill sand should be added at a rate of 3–8 kg per square meter, depending on the chosen turf. The sand should be rounded and can be found at hardware stores. The best infill is light-colored quartz sand with the smallest possible grain size.
This infill sand helps extend the life of your turf by adding weight, which keeps it in place. The sand won’t be visible because it settles at the base of the grass blades, helping them stand upright. You can add the sand at any time after installation.
Securing the Edges
If you want to secure the turf, you can use artificial turf landscape spikes along the edges. These are best for the job and are especially useful on sloped surfaces like hills. For asphalt, you can use long 5–6 inch nails with small washers at the base. For other hard surfaces like concrete, fasteners are usually not needed.
You can also end the turf edge directly against the ground, for example, bordering a flower bed. However, this requires extra maintenance to ensure no soil or dirt gets onto the turf. We recommend using a stylish edging for a cleaner, more finished look.
The Final Brush
Finally, brush the grass blades upward. You can do this with a regular street broom, or for larger yards, you can rent a lightweight power brush from a tool rental company. Brushing the turf gives it a full, natural look and helps the infill settle in properly.
Use and Maintenance of Artificial Turf
To keep your artificial turf looking beautiful and natural, it’s a good idea to regularly remove organic debris like leaves, twigs, and seeds. If these natural materials are not removed, they will decompose and lead to the growth of moss and weeds.
Leaf and Debris Removal
Leaves and other debris can be easily removed from your artificial turf using a standard leaf blower. The need for proactive maintenance depends on your surrounding environment and how often you use your lawn.
Heavy Objects
If you place a heavy object on your artificial turf—like a trampoline, a kids’ pool, or an outdoor hot tub—the turf fibers will become compressed.
After removing the heavy object, you can brush the fibers back up with a standard stiff-bristled broom to restore your lawn to its original look. It’s worth noting that over a long period, a permanent indentation may be visible.
Always remember to brush your artificial turf against the natural direction of the fibers.
Winter Care for Your Artificial Turf
Winter conditions are not a problem for artificial turf. It won’t get damaged by frost or break from being used in cold weather. However, it’s important to remember that if snow becomes compacted and a layer of ice forms on the turf, you should not try to remove it mechanically. Doing so can damage the fibers. The ice must be allowed to melt naturally.
Fire and Hot Objects
Always avoid letting fire and hot objects—like barbecue coals or cigarette butts—come into direct contact with your artificial turf. The heat will melt and damage the surface of the turf. While repairs are possible, the turf will not be able to be restored to its original, like-new condition.
Weed and Moss Control
Preventing weeds and moss is one of the biggest benefits of artificial turf, but it still requires a bit of maintenance to keep your lawn in perfect condition.
Regularly removing weeds is easy—simply brush or rake your lawn to pull them out before they have a chance to take root. You can also use environmentally friendly products designed to eliminate algae, moss, and weeds. Just be sure to follow the product instructions carefully, and they won’t harm your turf.
Important: Allowing excessive weeds to grow on your artificial turf may void its warranty.
Artificial Turf Warranty
Under normal use, your artificial turf will have a very long lifespan. We provide a seven-year UV resistance warranty. With this warranty, the artificial turf is considered to have maintained its durability if the tensile strength of the fibers has not decreased by more than 50% from the original.
This warranty does not apply if:
- The artificial turf has been used for a purpose other than typical ground covering for a yard or garden.
- Damage has occurred as a result of incorrect handling, installation, or repairs.
- Any defects or damage are caused by:
- Fire, tearing, accident, vandalism, negligence, or misuse.
- The use of infill sand other than what is recommended for the turf.
- Using the turf for a purpose for which it was not designed and installed.
- The use of incorrect cleaning methods or strong cleaning agents, pesticides, and insecticides.
- Exposure to temperatures exceeding 75°C.
- Negligence in the proper maintenance, protection, or repair of the turf.
Artificial turf is always subject to normal wear and tear. Normal wear and tear is not a manufacturing defect and is not covered by this warranty. In addition to the factors listed above, wear depends on the amount of use the turf receives. Due to the effects of temperature, cold, and UV radiation, the turf is subject to minor expansion and contraction. This is influenced by the surface on which the turf is installed. An expansion and/or contraction rate of 1% is considered to be within the defined limits.
Please note that the warranty has a pro-rated factor. Keep your receipt to make a warranty claim and to prove when your artificial turf was delivered. Expomatto is not responsible for the installation or any additional warranty conditions provided by a reseller or installation company.